With the product page extension you can make the products accessible for visitors. This means that a separate page is published in the frontend for each product.
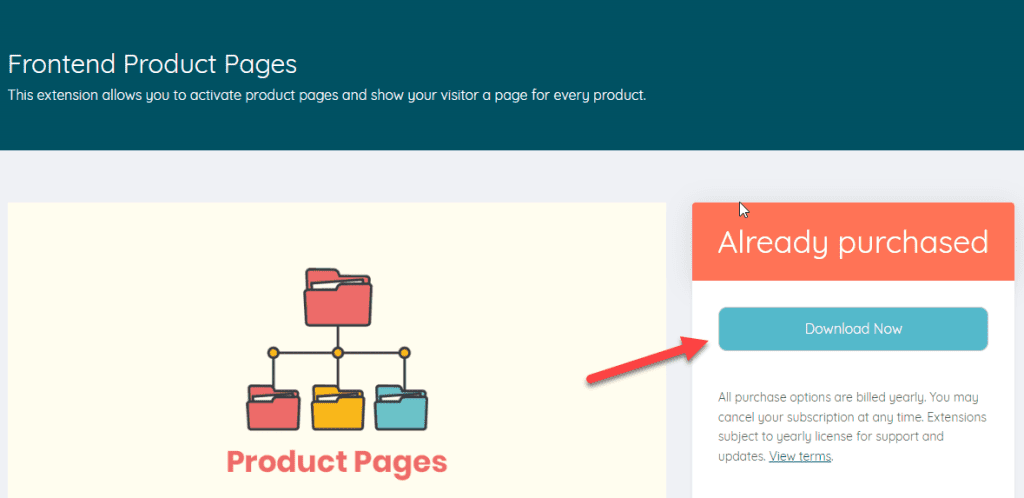
This feature is shown as an extension and can be downloaded under Add-Ons.

Then you can upload the ZIP file directly to WordPress as a plugin and install it. Do not forget to activate the extension under Licenses.

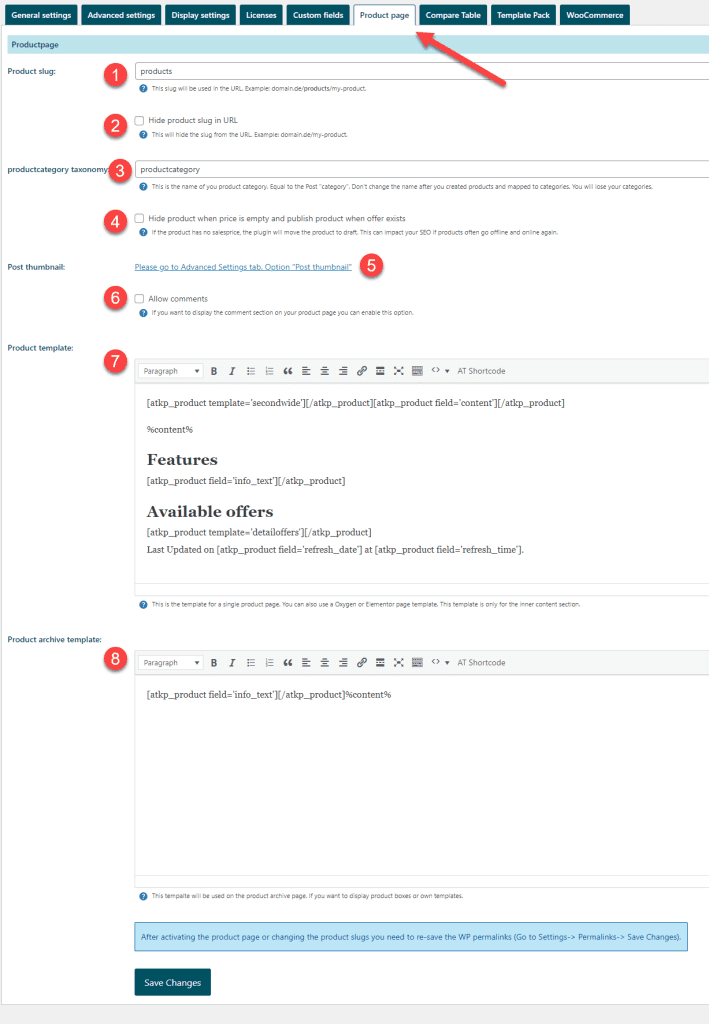
This is the name which is in the URL.

The second part is the name of the product which is derived from the product title by default. You can also change the name at any time in the product:

If you don't want to show any product slug in the URL at all, you can enable this option. This makes the SLUG in the URL disappear. However, we do not recommend it.
If you change the URL, you have to save the permalinks once again under Settings -> Permalinks. Otherwise you might get a 404 error in the frontend.
The product category is similar to the category in the posts. Here you can customize this category according to your own wishes.
Important: If you have already assigned product categories, you should not change this field. Subsequent changes can lead to data loss.
With this option the plugin switches the products offline when there are no offers. As soon as an offer is available again, the product will be put online again.
Important: If you enable this option, it may have an impact on your SEO. Google does not like it when the page is offline and later back online.
This option is stored directly in the settings. Just click on the link. You will find the following options under Settings:

This option does not import images into the library.
This option imports the main image into the media library. This image is also constantly updated.
Note that the image import prolongs the import and update of the products.
We recommend the use of the FIFU plugin. Instead of importing the images, they are stored as external post images.
This option enables the comments for products. If you have already created products, you have to activate the comments per product afterwards.
The product template represents the content of a page. Imagine they want to build each page the same way. Here you insert a placeholder at certain positions. This is simply replaced later. You can achieve exactly the same with the product template.
You can insert all the shortcodes you want on this page and static texts are no problem either. You can find the result of a product page here:

The product archive template also provides placeholders. You can get to the product archive page by entering the slug directly. So e.g.: domain.com/products
Here you could also output your own shortcodes or images.

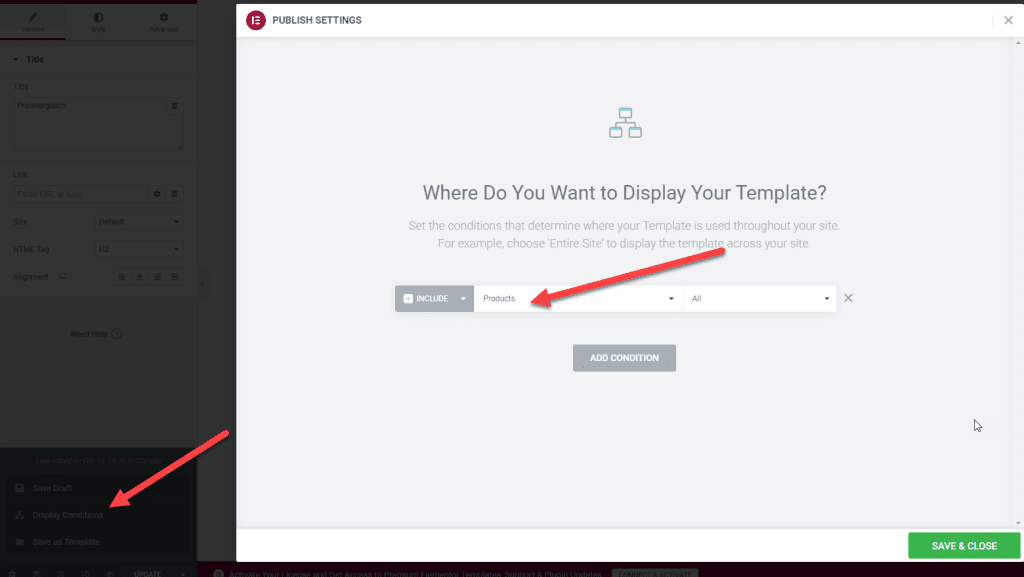
In Elementor's theme builder you can create your own pages. Once you have created the template, you can click on an arrow at the bottom right of Publish. After that you can select "Display Options".

Select Include Products and then click Save & Close.
The product pages on this website were created using Elementor:
https://www.side-by-side-kuehlschrank.net/kuehlschrank-finden/
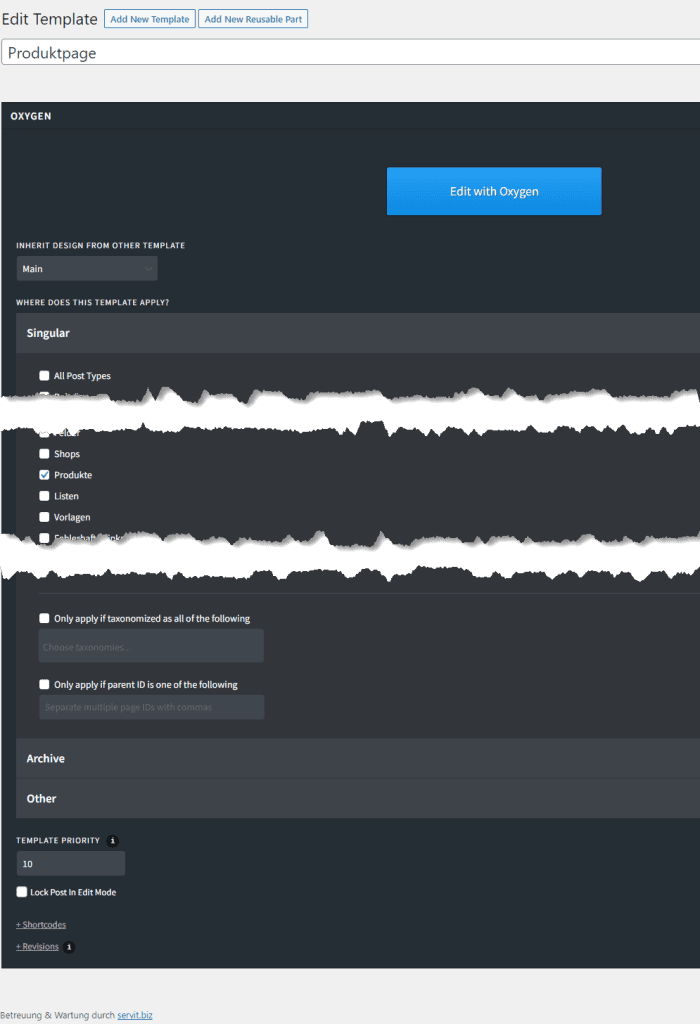
Simply create a new template under Oxygen -> Templates. Then select the "Poducts" for "Singular".

Once you publish the template, it will be displayed for the visitor.
The product pages here were implemented with Oxygenbuilder: https: //www.baustellenradios.net/baustellenradio-finden/
You can use affiliate-toolkit shortcodes in the template. Just remove the ID from the shortcode to output the templates:
[atkp_product template='123' hidedisclaimer='yes'][/atkp_product]