With the custom fields you can extend your product data without resorting to a paid extension like ACF or Metabox. However, our extension is a bit simpler and tailored directly to product data.
This feature is shown as an extension and can be downloaded under Add-Ons.
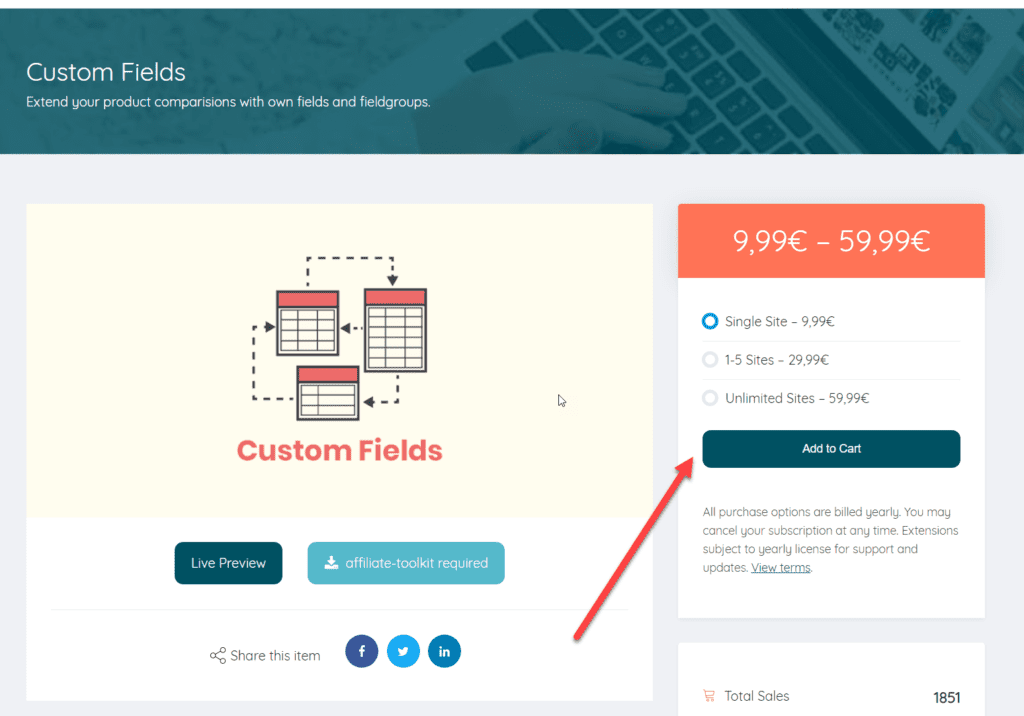
Then you can upload the ZIP file directly to WordPress as a plugin and install it. Do not forget to activate the extension under Licenses.
The global user-defined fields are best suited for fields that should be available for each product. Regardless of the product type.
For example, when creating a tool comparison, you would store the package size dimensions and product weight here.
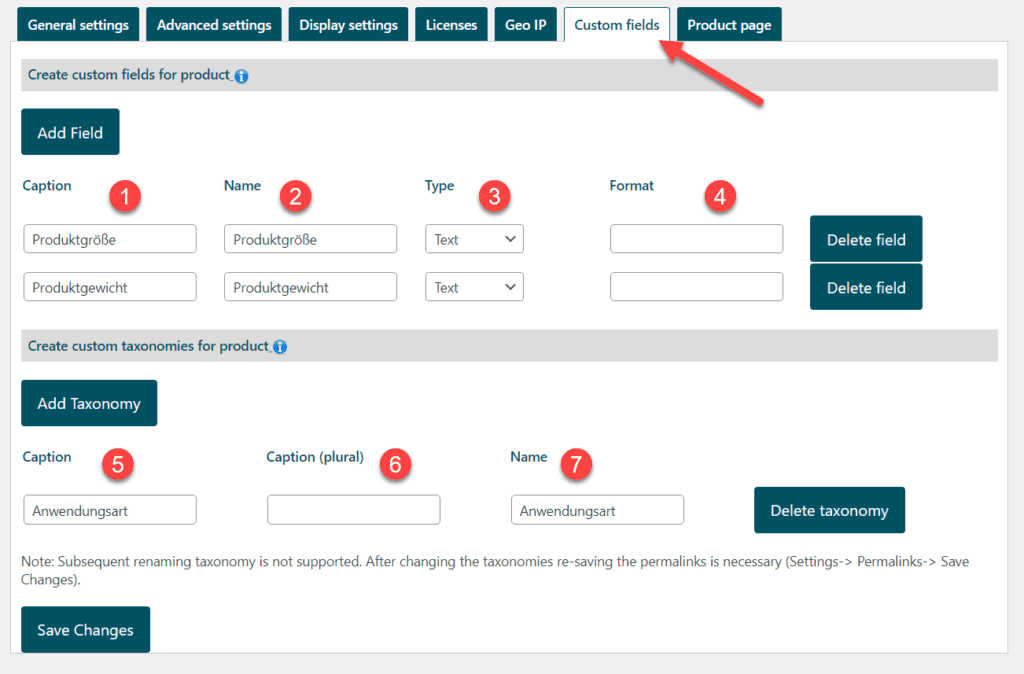
This designation can be freely selected and is also displayed in the frontend in some cases.
The name is used as a placeholder in the templates (with "customfield_" as prefix). This name is validated internally and corrected if necessary if invalid characters are contained.
If the field remains empty when you enter it, a unique number is inserted into the field. We recommend assigning your own unique name. Please do not change after the fact.
With the field type you can determine which field will be displayed in the backend. The display in the frontend is also partially dependent on this.
Depending on the type, "options" can also be specified here. These options are available here:
This designation can be freely selected and is also displayed in the frontend in some cases. Taxonomies are selection fields similar to the category in the post. These are then displayed with the product and can be checked. Multiple selection is also possible.
The name for plural can be freely chosen. It is currently only used in the backend for display.
The name is used as a placeholder in the templates (with "customtaxonomy_" as a prefix). This name is validated internally and corrected if necessary if invalid characters are contained.
If the field remains empty when you enter it, a unique number is inserted into the field. We recommend assigning your own unique name. Please do not change after the fact.
Field groups are created per product category. If you have a tool comparison, you create a field group "Planer", "Cordless screwdriver" or "Drill" and store there only the fields that are relevant for the respective product category. The field group is then assigned to a product category. Every product that is in this product category gets these fields displayed.
A field group is created via the WordPress menu.
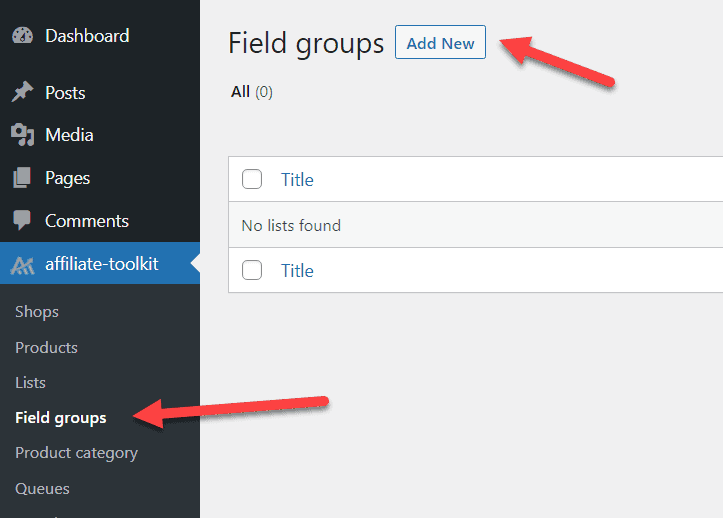
After that you can create the fields in the field group.
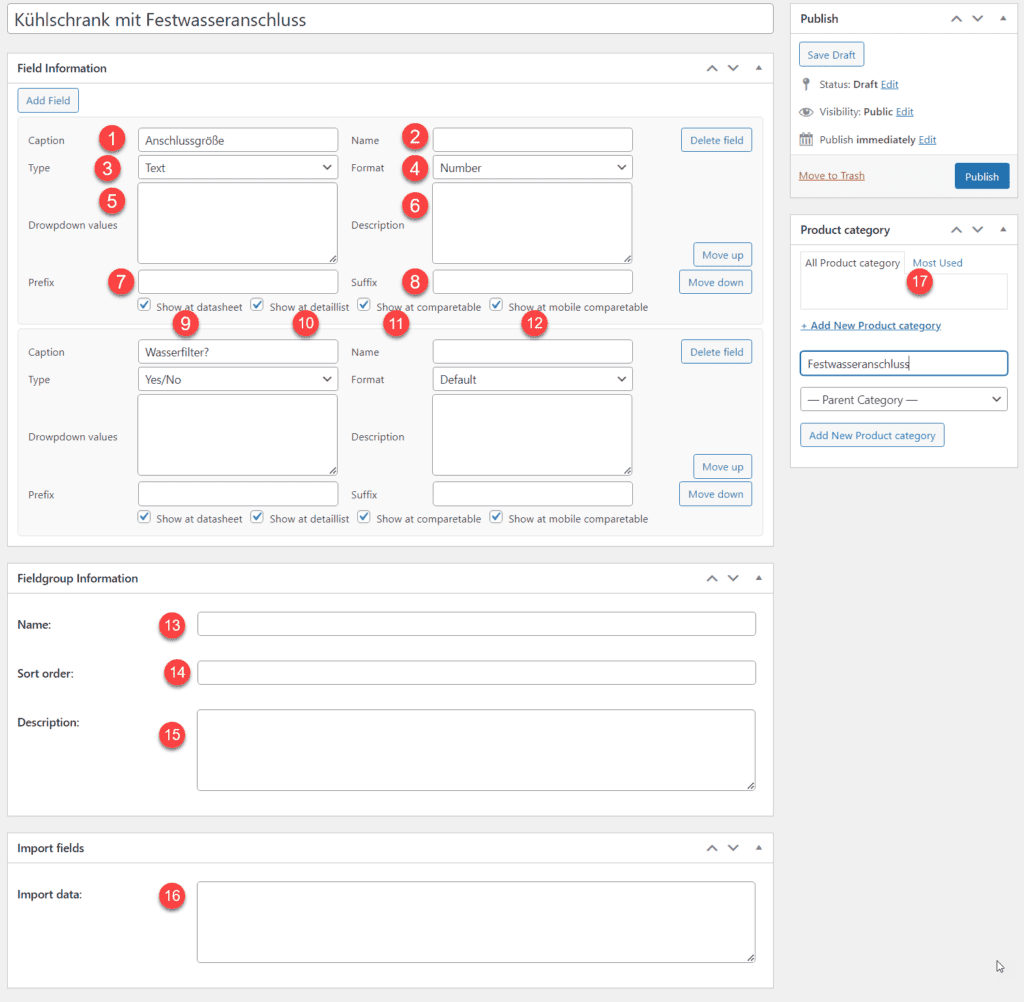
This designation can be freely selected and is also displayed in the frontend in some cases.
The name is used as a placeholder in the templates (with "cf_" as prefix). This name is validated internally and corrected if necessary if invalid characters are contained.
If the field remains empty when you enter it, a unique number is inserted into the field. We recommend assigning your own unique name. Please do not change after the fact.
With the field type you can determine which field will be displayed in the backend. The display in the frontend is also partially dependent on this.
Depending on the type, "options" can also be specified here. These options are available here:
If "Selection field" is selected for the field type, the valid values must be entered here.
This description is displayed as a tooltip above the comparison value in the comparison table.
To get comparison values for numerical values, switch the format to "Number" and then enter the unit of measurement in the prefix or suffix. This way the number is output properly formatted and at the same time you can filter by it.
For example: A field "Height" has "cm" as suffix. In the field next to the product, enter "100" as the value. It is displayed as "100 cm". If you would use the Prefix field, the output would be "cm 100".
To get comparison values for numerical values, switch the format to "Number" and then enter the unit of measurement in the prefix or suffix. This way the number is output properly formatted and at the same time you can filter by it.
If a check mark is set here, the comparison value is displayed at the "Data sheet (automatic)".
If a check mark is set here, the comparison value is displayed with the "Detail list (automatic)".
If the check mark is set here, the comparison value is displayed in the "Comparison table (automatic)".
As for the comparison table (mobile only).
This name is displayed in the backend with the fields in the product.
This order is taken into account when listing the fields (from different field groups).
Represents an internal info field. Currently not displayed.
Fields can be created automatically via the "Import data" text field. This can be done either via an HTML table (copy + paste) or via a product page URL from billiger.de.
In both cases, the HTML table is recognized and the fields are automatically created for it. The values themselves can be imported into the fields via the product.
To do this, simply select ide HTML table:
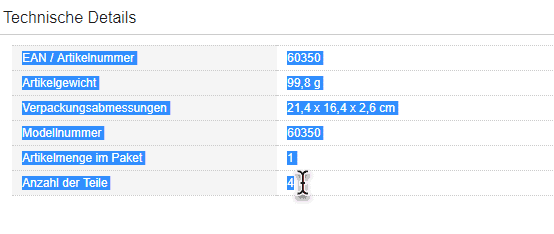
Copy & Paste
Then "Save" the field group. Provided that the table has been recognized, you can now see fields.
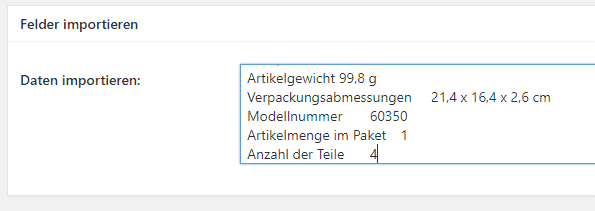
The same field exists with the product. Here you can select the exact same table and copy & paste it. If the fields are recognized, the corresponding value is then stored here in the field of the product.
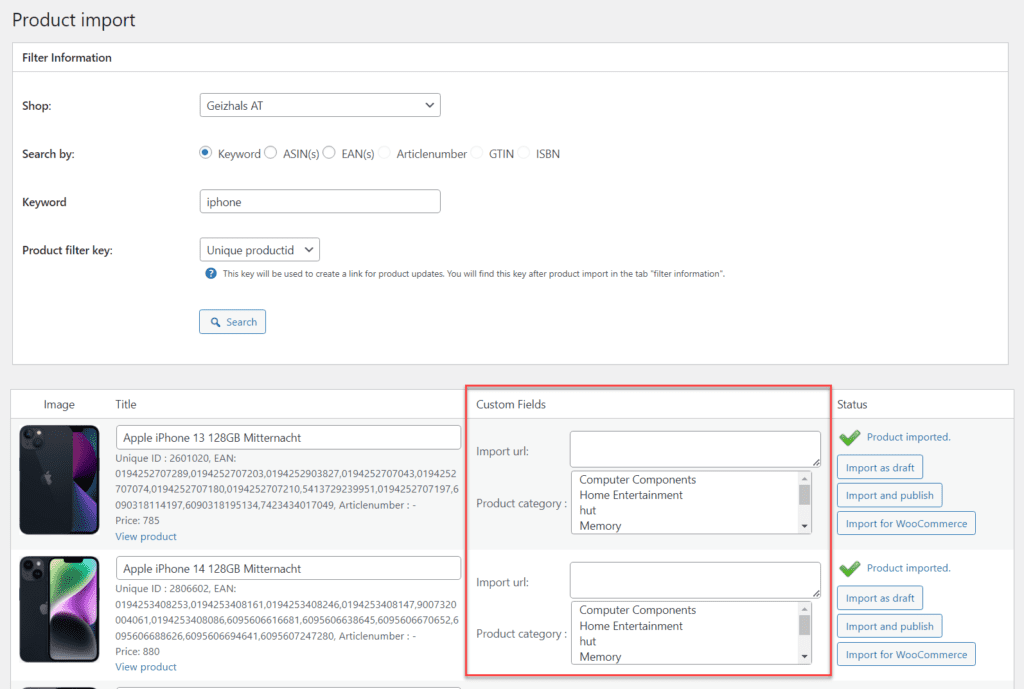
With this extension you also activate the fields in the product import mask for the assignment directly when importing a product.
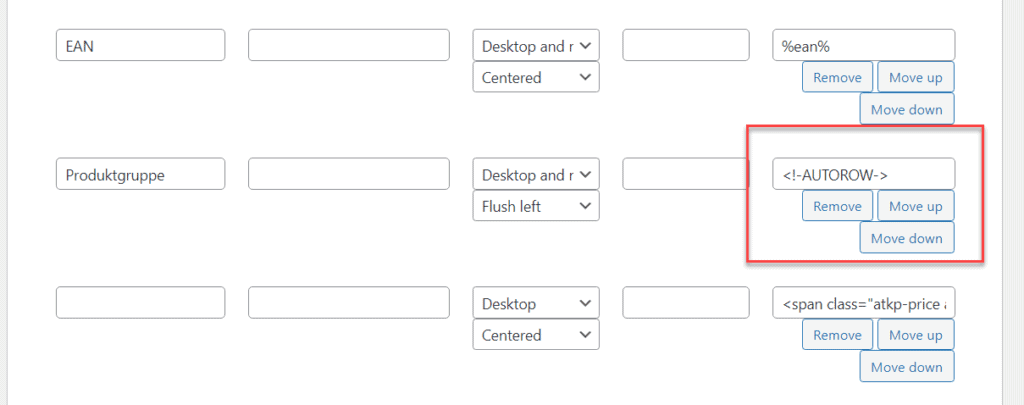
If you use the comparison tables, you can use the field groups to automatically display fields in your comparison.
Just add this code in one line of the comparison table. At this point, all fields from the field groups are then automatically displayed.
<!-AUTOROW->In our example, it looks like this:
You are currently viewing a placeholder content from Facebook. To access the actual content, click the button below. Please note that doing so will share data with third-party providers.
More InformationYou need to load content from hCaptcha to submit the form. Please note that doing so will share data with third-party providers.
More InformationYou need to load content from reCAPTCHA to submit the form. Please note that doing so will share data with third-party providers.
More InformationYou need to load content from reCAPTCHA to submit the form. Please note that doing so will share data with third-party providers.
More InformationYou need to load content from reCAPTCHA to submit the form. Please note that doing so will share data with third-party providers.
More InformationYou need to load content from Turnstile to submit the form. Please note that doing so will share data with third-party providers.
More InformationYou are currently viewing a placeholder content from Instagram. To access the actual content, click the button below. Please note that doing so will share data with third-party providers.
More InformationYou are currently viewing a placeholder content from X. To access the actual content, click the button below. Please note that doing so will share data with third-party providers.
More Information