If you want to maintain manual product data for a store manually in one place, CSV import is a good interface. You can create your own list and use it for import.
First, create a CSV file on your computer. You can create them either with Excel or with any other editor.
Enter the column headers in the first row. Required fields are the product number and the product title. You can simply count up the product number consecutively.
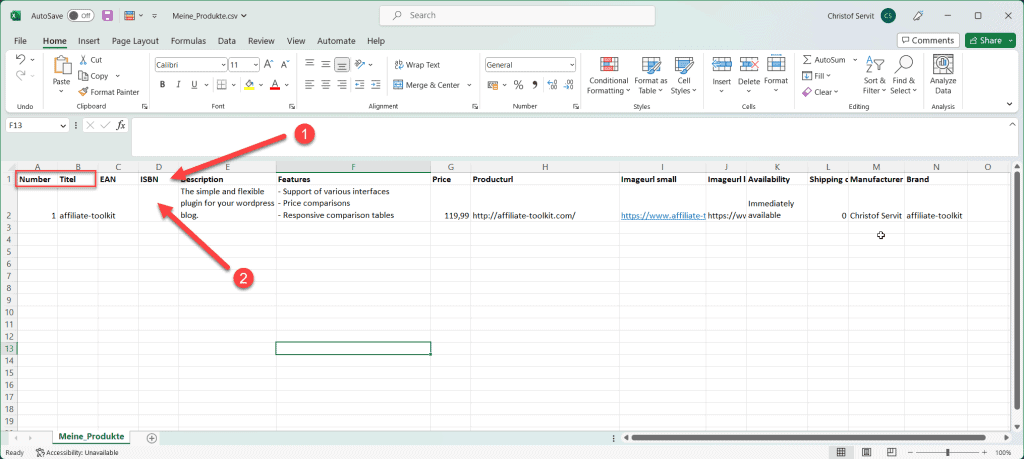
To make it easier to link the columns in the plugin, specify the columns in Excel here. Otherwise the plugin would later display only "Column 1", "Column 2", etc.
You can create as many products as you want. The important thing is the consecutive number. The product will later be regularly updated via this number.
Then we save the Excel file with the following options.
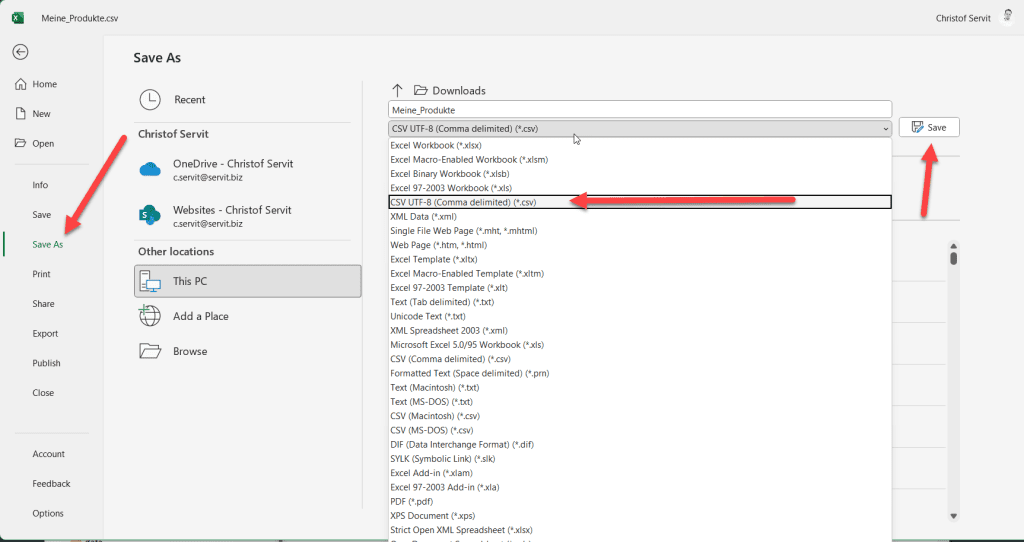
Click on "Save as" and then select UTF-8 (comma separated) for the CSV file.
If you get a warning when saving (some features may be lost) you can simply ignore it.
You can now open the file in the text editor. To do this, simply click "Open with" and then "Notepad".

You can now recognize the text file itself which we need for the import:

If you don't have Microsoft Excel, just create the file with Notepad. Pay attention to the separators. If the separator occurs in your text, put the value under quotation marks.
You can also download the text file here.
Once the file is created, you can either FTP it to your web server or simply drag and drop the file into the media library. Simply upload the file using drag and drop.
Then copy the URL to the clipboard.

Create a new CSV store and configure it as shown in the image below. Here you can find more information about the CSV interface.
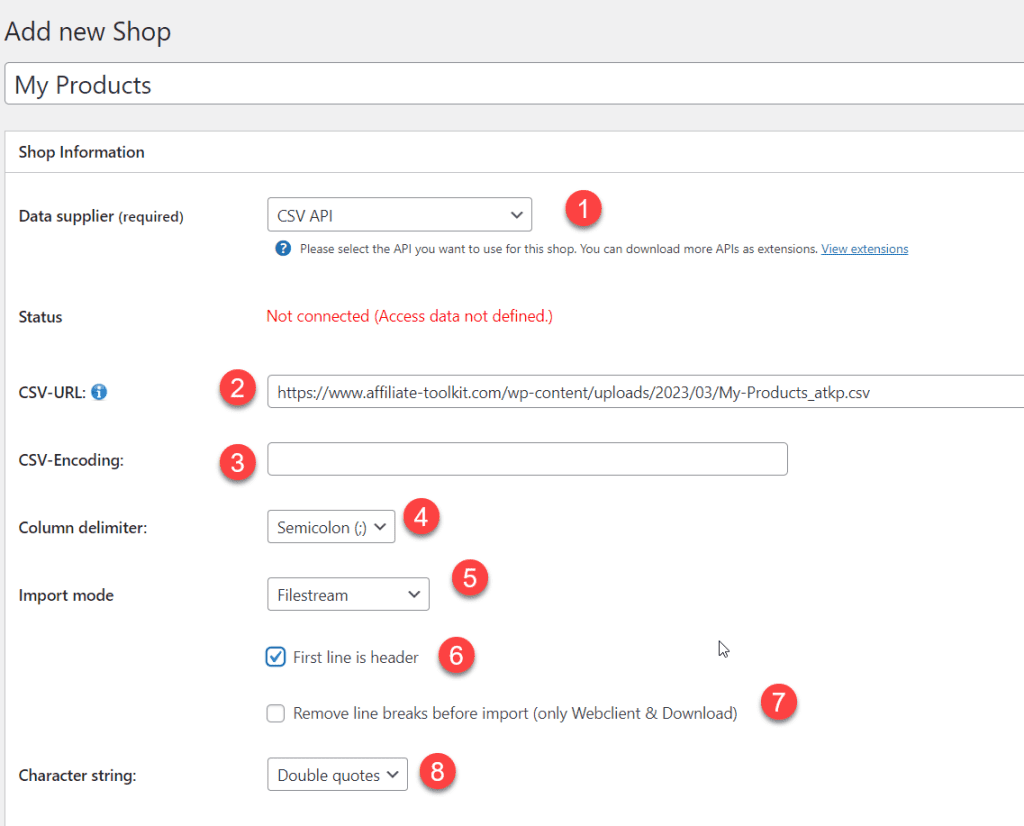
With this you can import any text files and that's what we want in this case.
Here you enter the URL from the clipboard.
This field remains empty because we saved the CSV file as UTF-8 file.
We use the semicolon in our example. But you can use any separator for your CSV file.
In this case we use Filestream. The file is located directly on our server.
Since we have specified column headers in our CSV example, we put a check here.
Here we do not have to reconfigure anything.
We also leave these settings at default.
After saving the new store, you need to link the fields from the CSV file to the fields.
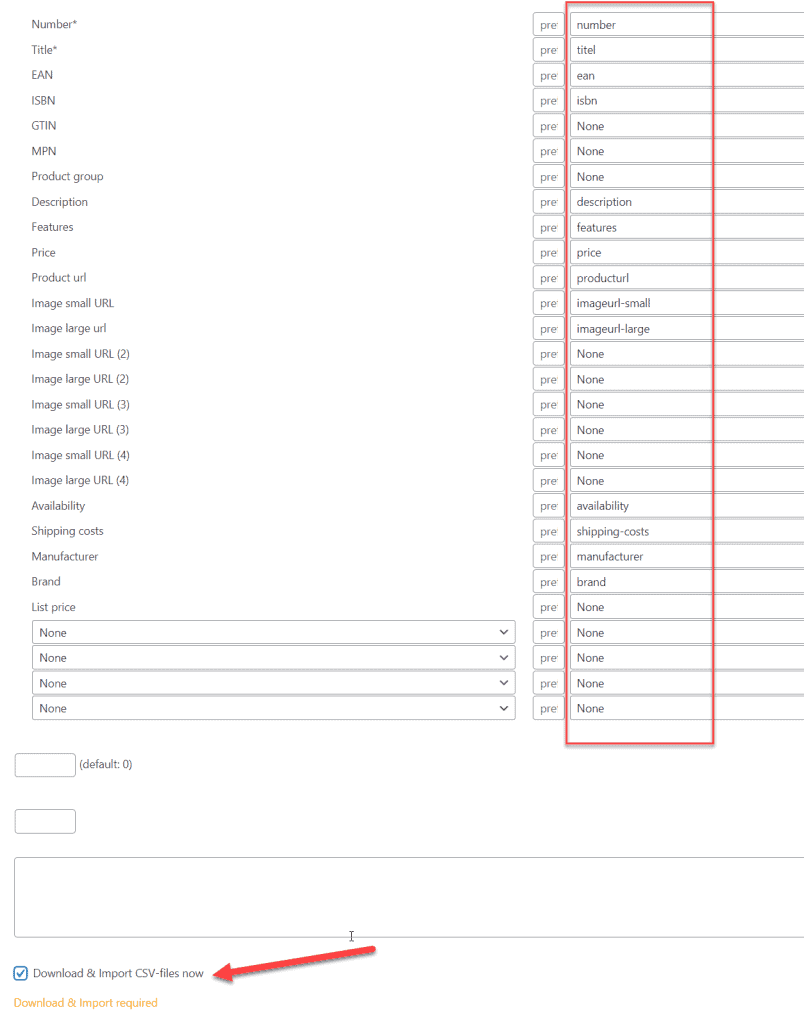
Each field that you have created in the CSV file, you link here with the respective field.
With this hook, the data in the product cache will be updated. After you have made the changes to the CSV file, you need to check the box again.
From now on you use again the usual functionality from the plugin and you can import the products into the internal product database.
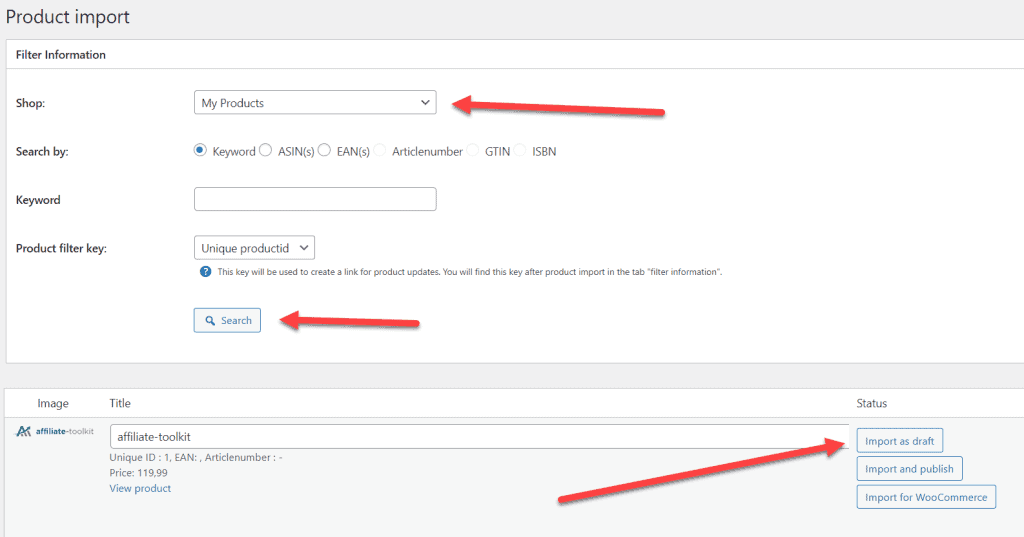
Select here the store which we have configured before.
Simply use the search without a search term.
Select an "import option" and then ntu the products on your website.
We have written a separate article on this. You can find it here. You can find the explanation for shortcodes here.
You are currently viewing a placeholder content from Facebook. To access the actual content, click the button below. Please note that doing so will share data with third-party providers.
More InformationYou need to load content from hCaptcha to submit the form. Please note that doing so will share data with third-party providers.
More InformationYou need to load content from reCAPTCHA to submit the form. Please note that doing so will share data with third-party providers.
More InformationYou need to load content from reCAPTCHA to submit the form. Please note that doing so will share data with third-party providers.
More InformationYou need to load content from reCAPTCHA to submit the form. Please note that doing so will share data with third-party providers.
More InformationYou need to load content from Turnstile to submit the form. Please note that doing so will share data with third-party providers.
More InformationYou are currently viewing a placeholder content from Instagram. To access the actual content, click the button below. Please note that doing so will share data with third-party providers.
More InformationYou are currently viewing a placeholder content from X. To access the actual content, click the button below. Please note that doing so will share data with third-party providers.
More Information