In this article we will set up the CSV interface with affiliate-toolkit. You can use it to connect products and lists from countless stores.
The first thing you need to do is find out the CSV feed URL. At most affiliate networks you will find a tool for "Create a Feed" or similar functions.
Here, for example, the tool to create a feed for AWIN:
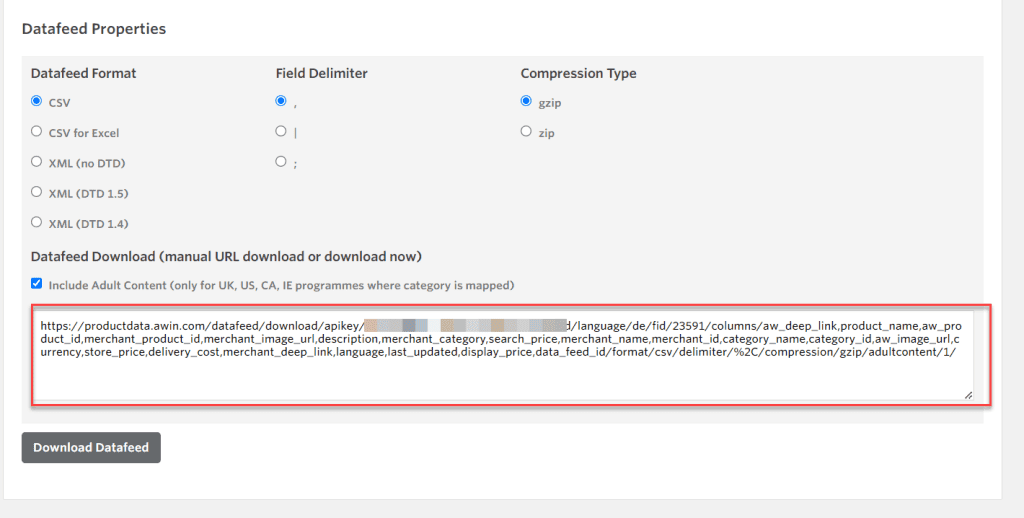
The feed URL is with the red box. Depending on the provider, it may look different. Please note that this URL should not be shortened. Copy the full URL into the URL field of the store.
It is important that you select CSV (UTF8 if available), if available you can also enable GZIP. Our plugin does not support the import of ZIP files.
We download the CSV feed from the respective provider and import it into a temporary table.
Please make sure that your database allows this size. A feed with one gigabyte will also load the database with one gigabyte. Some hosters have limits here.
The PHP option"allow_url_fopen" must be active on your host. This option enables the URL-enabled fopen wrappers that allow external access to URL objects such as files.
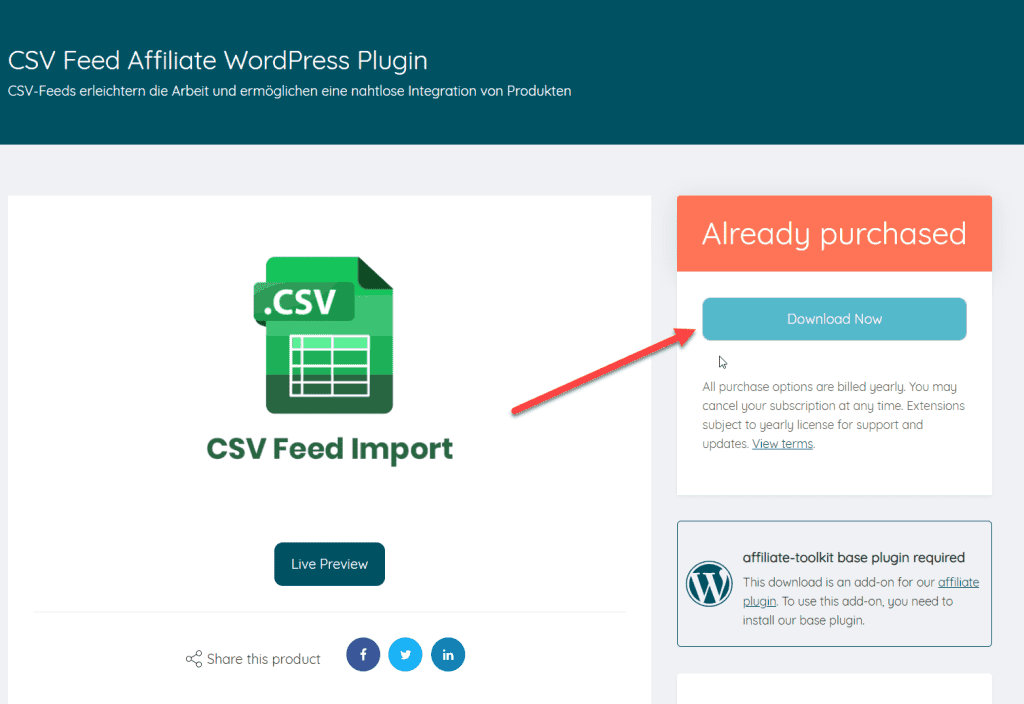
Download the extension from our website. To do this, click on "Download now":
You can then upload and install the ZIP file normally via the WordPress plugin installation. After activation, the CSV interface is also selectable under Shop API.
Now create a new store in affiliate-toolkit under Shops.
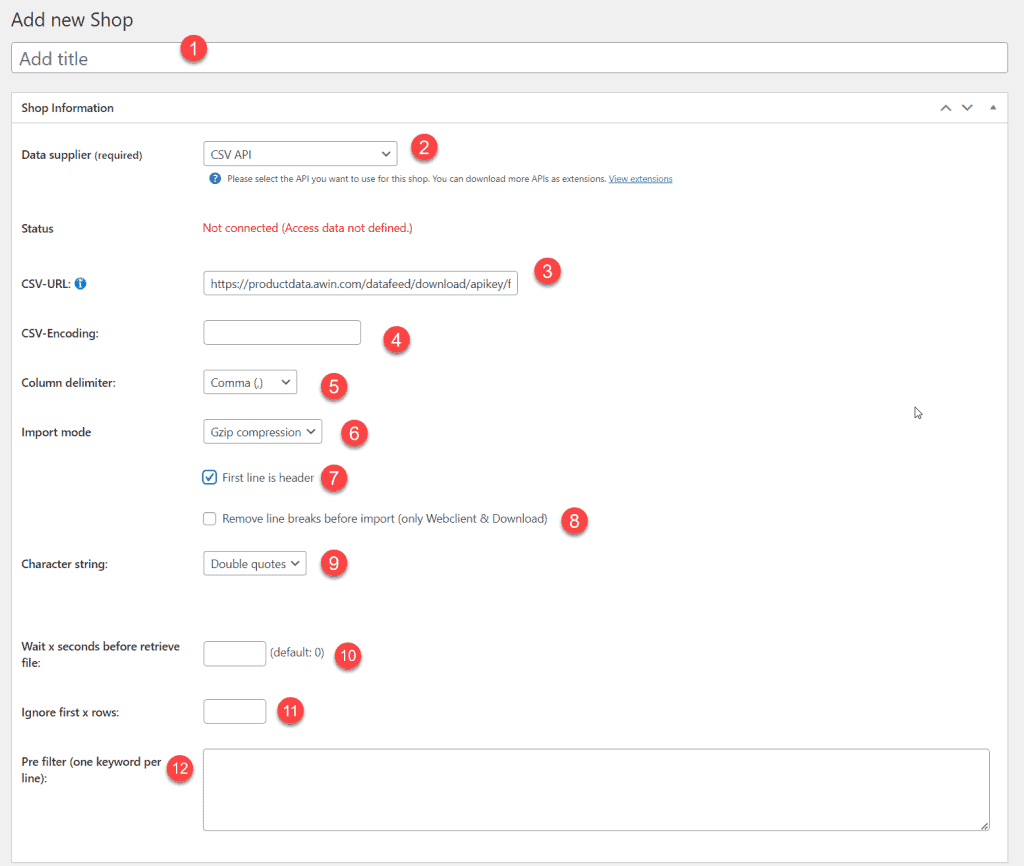
The designation can be freely selected and is only used internally.
Here you select CSV API.
Insert here the feed URL you generated from the respective Create a Feed tool.
By default, the files are opened with the UTF8 character set. So you don't have to enter anything in that case.
There are CSV files which have a different character set. In this case, you must enter the necessary character set. If the file uses e.g. the Windows character set 1252, you can enter"ISO-8859-1". The characters are then converted from code page 1252 to UTF8 during import.
This separator separates the fields from each other. You either have to see directly in the Create a Feed tool which separator it is or you have to open the file in the editor and check which character it is.
We currently support the following separators:
The import mode specifies how the file should be imported. So you can choose between:
If your file contains a column header, select this option. Most vendors send a column header with the file. Otherwise you will only get column 1 to column x as field name.
This option can be used to clean up the import file. Some vendors insert line breaks in item descriptions which can cause problems during import. This option removes the line breaks before import.
For example, if the product title or description contains the delimiter itself, add either a quotation mark (") around the text or an apostrophe (') around the text.
Here you can define a waiting time before the upload. As a rule, you do not need this.
If your import file has a summary in the first lines, then it would be good to skip those lines. This is the only way to read in the columns correctly.
Allows you to specify search terms for the feed during import. Only if this search term is present in the line, the line will be imported. For example, categories "Technology" can be imported but "Fashion" is ignored.
After you save the store, the recognized fields will be listed. These fields must now be assigned. On the left you can see the field name of affiliate-toolkit. On the right you need to select the field name in the CSV.
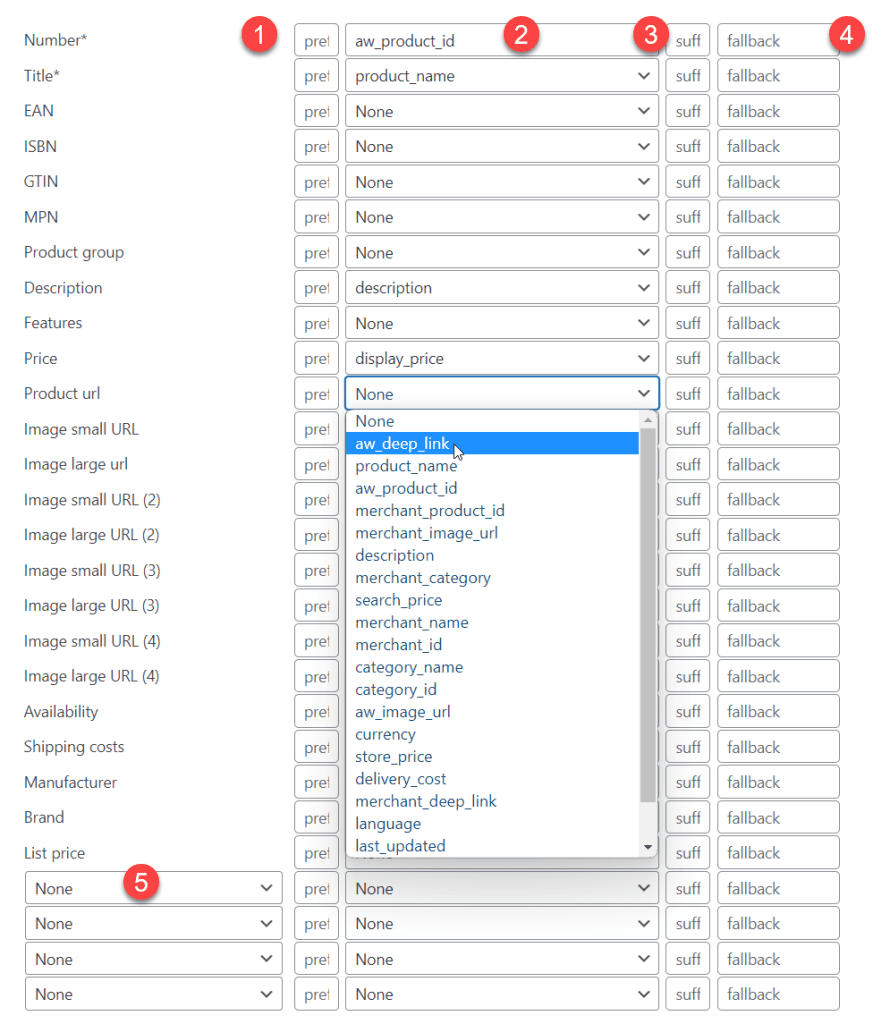
Here you can append a value to the front of the field. e.g. with the prefix "https://" the field "domain.com/prd1" becomes "https://domain.com/prd1".
Select the correct field name here. Once the data has been imported, you will also see a sample value in parentheses.
Here you can append a value to the end of the field. e.g. with the sufix "?ref=1" the field "https://domain.com/prd1" becomes "https://domain.com/prd1?ref=1".
If the field does not contain a value, the fallback value is taken.
Here you can fill your own fields with CSV values.
After you have linked the fields, you can load the product data.
You can see that the store is marked with "Download & Import required" in orange.
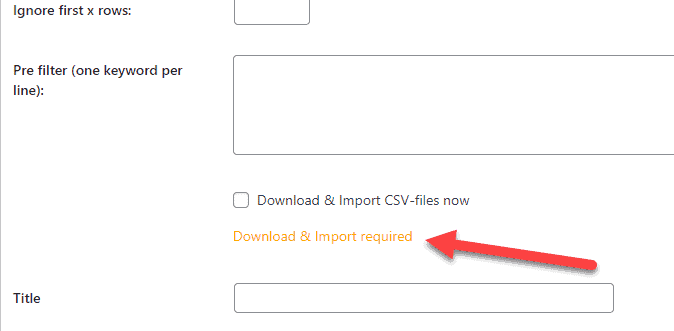
Here the product feed is not yet imported. There are two ways to do this:
You can start the import manually by checking the "Download & Import required" box. Then you save the store.
Here we have put together some more sample configurations. Of course, it is possible that your configuration has changed in the meantime.
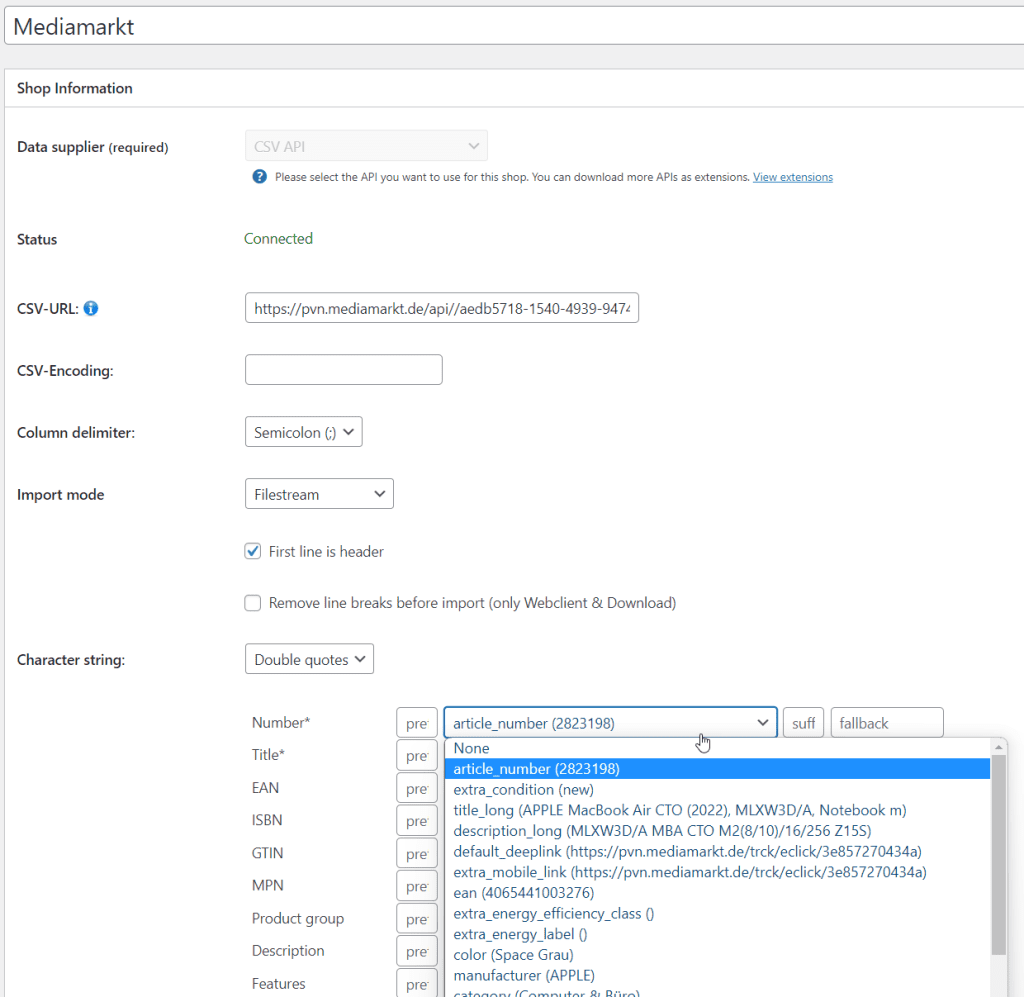
We have used this configuration for Mediamarkt.
We are still trying to find a sample configuration here.
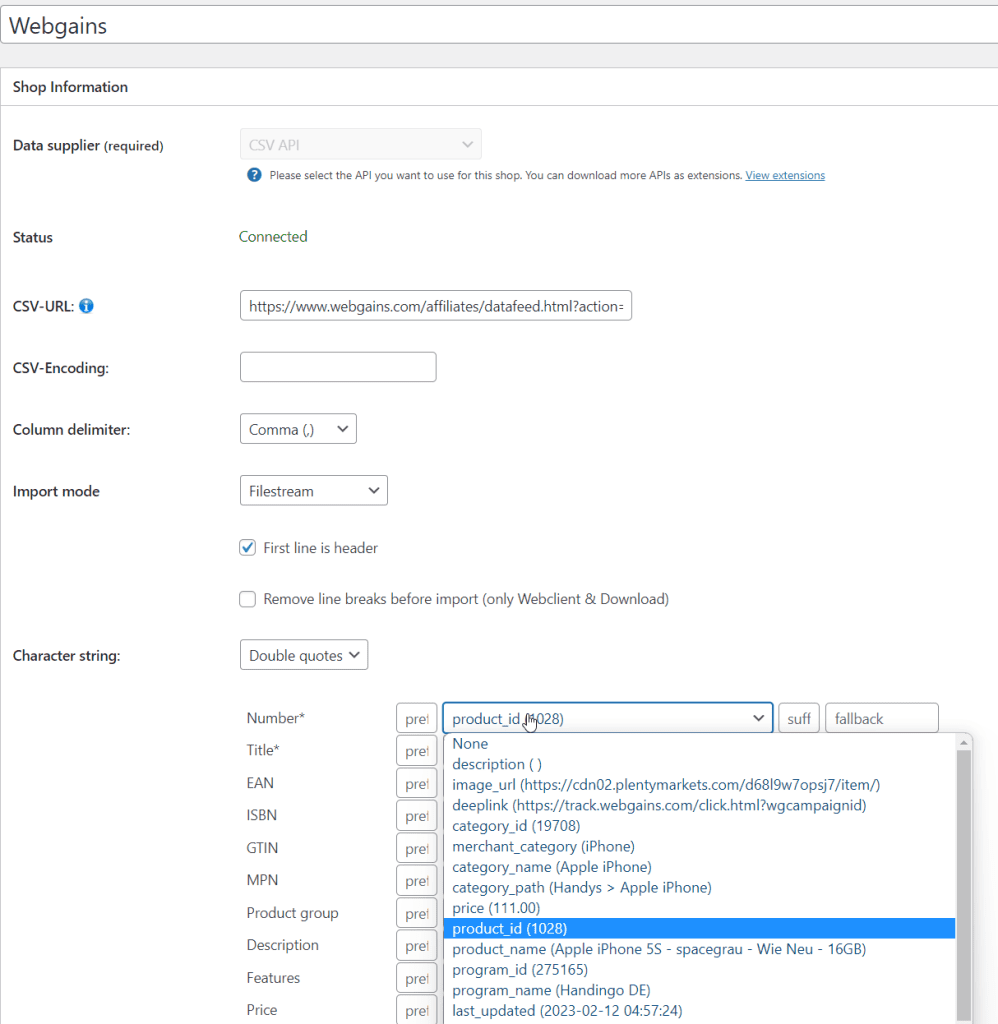
This is the configuration we used for Webgains.
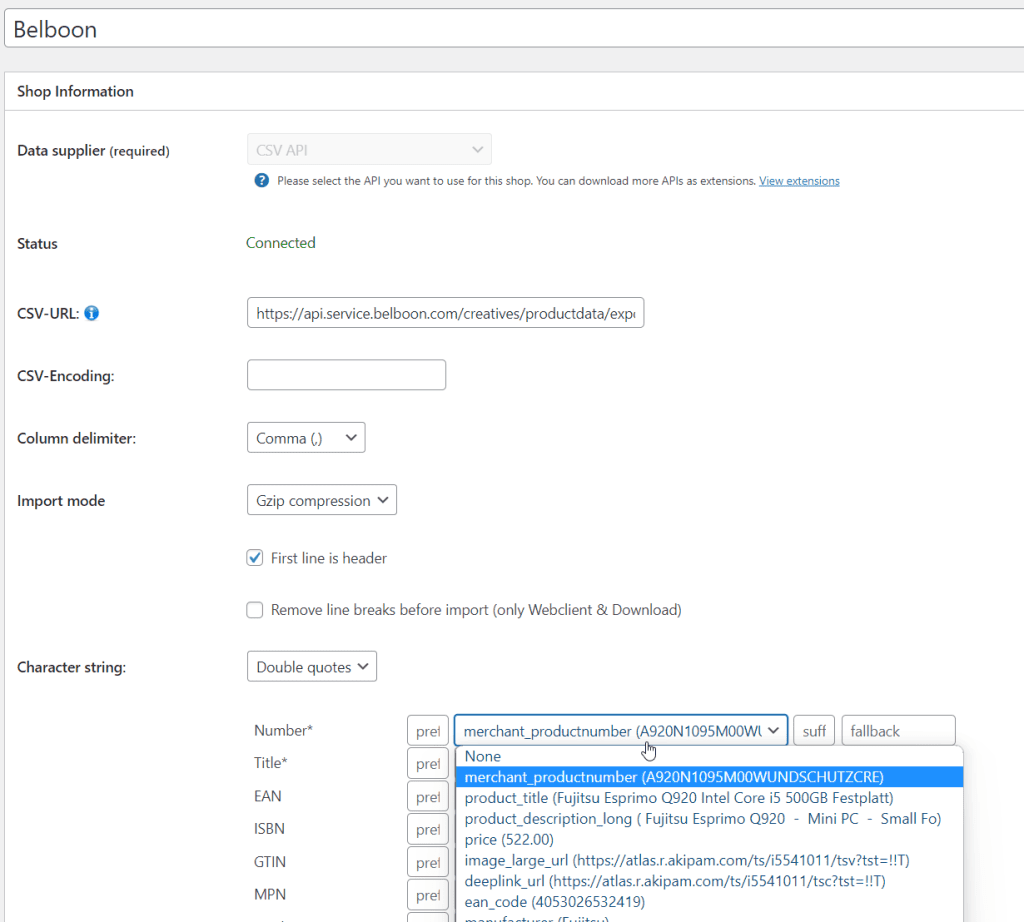
This is the configuration we used for Belboon.
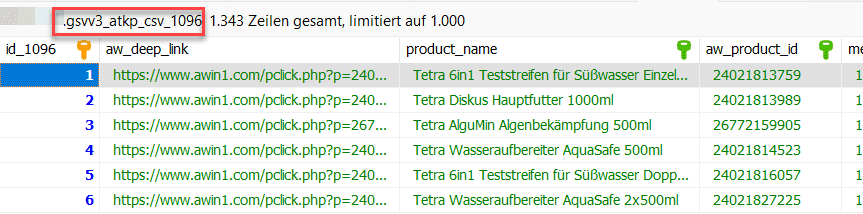
You will find a new table in your database named {prefx}_atkp_csv_ {shopid}.
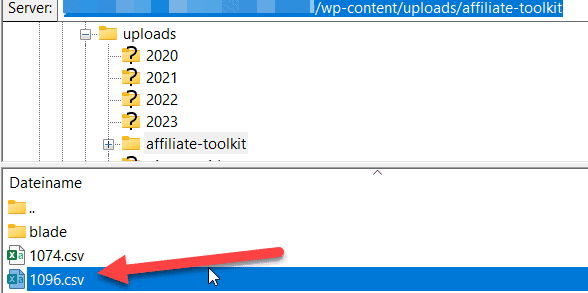
In the directory "/wp-content/uploads/affiliate-toolkit" you will also find the associated feed CSV files:
A list is a group of products. You can create search lists and also extended lists here. We have also written a separate article on this.
We have written a separate article on this. You can find it here. You can find the explanation for shortcodes here.
You are currently viewing a placeholder content from Facebook. To access the actual content, click the button below. Please note that doing so will share data with third-party providers.
More InformationYou need to load content from hCaptcha to submit the form. Please note that doing so will share data with third-party providers.
More InformationYou need to load content from reCAPTCHA to submit the form. Please note that doing so will share data with third-party providers.
More InformationYou need to load content from reCAPTCHA to submit the form. Please note that doing so will share data with third-party providers.
More InformationYou need to load content from reCAPTCHA to submit the form. Please note that doing so will share data with third-party providers.
More InformationYou need to load content from Turnstile to submit the form. Please note that doing so will share data with third-party providers.
More InformationYou are currently viewing a placeholder content from Instagram. To access the actual content, click the button below. Please note that doing so will share data with third-party providers.
More InformationYou are currently viewing a placeholder content from X. To access the actual content, click the button below. Please note that doing so will share data with third-party providers.
More Information